
goodthings4me.tistory.com
파이썬 장고(Django)를 사용하여 개인용 서버 운영 시 SSL 보안 설정이 안 되어 있으면 구글 애드센스 수익화 등이 어려울 수 있다. 이 문제를 해결하기 위해 가상서버 호스팅 신청 후 테스트 해본 방법과 결과를 올려본다.
카페24 가상서버 호스팅 세팅하고, SSL 인증서 설정해보기(파이썬 장고 기반)
※ 글의 목차는 다음과 같다.
- 카페24 가상서버 호스팅 신청
- 파이썬 가상환경 및 장고(Django) 설치를 위한 리눅스(Ubuntu 20.04) 서버 설정
- 파이썬 가상환경 및 장고(Django) 설치
- 장고 로컬 서버 구동
- Gunicorn 설치 및 설정
- Nginx 설치 및 설정
- SSL 설치 및 설정
먼저, 카페24(cafe24)에서 가상서버 호스팅을 아래와 같이 신청하고, PyTTY를 사용하여 서버 환경설정을 먼저 함
카페24 가상서버 호스팅 신청(cafe24.com)
- 신청 서비스명 : SSD 가상서버 일반형
- OS : Ubuntu 20.04
- 대표 도메인 : pypy.kr
파이썬 가상환경 및 장고(Django) 설치를 위한 리눅스(Ubuntu 20.04) 서버 설정
[PuTTY 프로그램을 활용하여 가상서버에 로그인 후 명령어 실행]
- PuTTY는 해당 사이트에서 본인 PC OS에 맞는 실행 파일을 받는다. (윈도우인 경우 MSI (‘Windows Installer’) 64-bit x86)
- cafe24 가상서버의 login id는 root, password는 본인이 설정한 pw를 입력한다.
- djangotest는 가상서버 서비스 신청 시 본인이 입력한 아이디임
login as: root
root@xxx.xxx.xxx.xxx's password:
Welcome to Ubuntu 20.04 LTS (GNU/Linux 5.4.0-131-generic x86_64)

 * Documentation:  https://help.ubuntu.com
 * Management:     https://landscape.canonical.com
 * Support:        https://ubuntu.com/advantage

  System information as of Sun 19 Feb 2023 02:10:58 PM KST

  System load:  0.0                Processes:             130
  Usage of /:   13.7% of 25.22GB   Users logged in:       0
  Memory usage: 22%                IPv4 address for eth0: xxx.xxx.xxx.xxx
  Swap usage:   0%

295 updates can be installed immediately.
235 of these updates are security updates.
To see these additional updates run: apt list --upgradable

New release '22.04.1 LTS' available.
Run 'do-release-upgrade' to upgrade to it.

root@djangotest:~# ls
root@djangotest:~#
root@djangotest:~# python -V
Python 2.7.18rc1
root@djangotest:~# python3 -V
Python 3.8.2
root@djangotest:~# django-admin --version
Command 'django-admin' not found, but can be installed with:
apt install python3-django
root@djangotest:~# ls -a
.  ..  .bash_history  .bashrc  .cache  .gnupg  .lesshst  .profile  .vim  .viminfo  .wget-hsts

root@djangotest:~# whereis nginx
nginx:
root@djangotest:~# pwd
/root
root@djangotest:~# cd ..
root@djangotest:/# ls
bin   etc         initrd.img.old  lost+found  opt   run   sys  var
boot  home        lib             media       proc  sbin  tmp  vmlinuz
dev   initrd.img  lib64           mnt         root  srv   usr  vmlinuz.old
root@djangotest:/# pwd
/
root@djangotest:/# cd root
root@djangotest:~#
root@djangotest:~# sudo apt update

root@djangotest:~# sudo apt upgrade

root@djangotest:~# sudo apt list --upgradable
Listing... Done

root@djangotest:~# python3 -V
Python 3.8.10

# python3용 pip3 설치
root@djangotest:~# pip --version
Command 'pip' not found, but can be installed with:
apt install python3-pip
root@djangotest:~# sudo apt install python3-pip

root@djangotest:~# sudo apt install python3-venv

root@djangotest:~# pip3 -V   # 또는 pip3 --version
pip 20.0.2 from /usr/lib/python3/dist-packages/pip (python 3.8)- 우분투 20.04 버전의 경우, 파이썬 버전은 3.8.10임 (3.9로 업그레이드 안 하고 그대로 사용할 예정임)
- 우분투 업데이트 및 업그레이드 먼저 실행
- python3용 pip3 설치 시 sudo apt install python-pip 명령은 python2 버전용이며, 설치가 실패하면 sudo apt update 명령을 준다.
※ apt와 apt-get의 차이
apt는 Advanced Packaging Tool의 약자로 Ubuntu 같은 데비안 계열의 리눅스에서 사용하는 패키지 관리자이며, 패키지를 설치할 때 apt install 혹은 apt-get install을 사용하는데 apt와 apt-get(또는 apt-cache) 둘에는 큰 차이가 없고 apt는 자주 사용하는 옵션들을 추출해서 사용자들이 사용하기 편하게 쓰고 정보를 보기 좋게 출력해주는데 반해, apt-get에서는 옵션들이 좀 많고 오래되었기 때문에 좀 더 안정적이고 호환성이 높다라는 정도라고 함.
이런 이유에서 터미널로 소프트웨어를 설치 또는 관리 시에는 apt를 사용하고, 스크립트 작성 시에는 apt-get을 쓰는 것이 좋다고 하는데, 보기 좋은 출력이 필요하지 않다면 제한된 기능을 가진 apt를 쓸 필요는 없다고 생각됨.

파이썬 가상환경 및 장고(Django) 설치
PuTTY를 이용해서 파이썬 가상환경과 장고(Django)를 설치하고 프로젝트를 생성한 후 gunicorn, nginx, ssl을 추가적으로 설치하여 정상 작동하는 것을 확인하고 VS Code로 원격 접속을 해보니 장고의 모듈 import가 제대로 안 되는 현상이 발생했다. 무슨 문제인지는 전문가가 아니라서 알 수는 없었고, 할 수 없이 cafe24에 서버 재 설치를 신청하고 다시 진행을 했다.
리눅스를 많이 아는 것도 아니었고 서버 전문가도 아니다보니 이런 테스트 설치 시에 여러번의 시행착오는 각오해야 했다. 느낌 상 파이썬 가상환경은 상관없지만 장고(Django) 설치는 VS Code로 서버에 원격 접속 후 VS Code 터미널로 작업을 해야겠다는 생각에 과감하게 OS 재 설치 후 작업을 다시 진행했다.
※ VS Code 원격 접속 방법은 [Visual Studio Code] VS Code로 원격 서버 remote-ssh 연결 절차 (원격 서버 접속하는 방법) 포스팅 글 참조
파이썬 가상환경 생성
# 파이썬 가상 환경 폴더 생성
root@djangotest:~# mkdir djangotest
root@djangotest:~# ls
djangotest

# 폴더 삭제 : root@djangotest:~# rm -r djangotest

# 파이썬 3.8 기반 가상 환경 생성 : python3 -m venv venv

root@djangotest:~# cd djangotest/
root@djangotest:~/djangotest# python3 -m venv venv
root@djangotest:~/djangotest# python3 -V
Python 3.8.10
root@djangotest:~/djangotest# ls
venv
root@djangotest:~/djangotest# source venv/bin/activate
(venv) root@djangotest:~/djangotest# ls
venv
(venv) root@djangotest:~/djangotest# python3 -V
Python 3.8.10
파이썬 가상환경에 장고(Django) 3.2 설치 및 프로젝트 생성
# 장고 3.2 설치
(venv) root@djangotest:~/djangotest# pip3 install django==3.2

(venv) root@djangotest:~/djangotest# python3 -m pip install --upgrade pip
(venv) root@djangotest:~/djangotest# pip -V
pip 23.0.1 from /root/djangotest/venv/lib/python3.8/site-packages/pip (python 3.8)

(venv) root@djangotest:~/djangotest# django-admin  --version
3.2

(venv) root@djangotest:~/djangotest# cd venv/
(venv) root@djangotest:~/djangotest/venv# ls
bin  include  lib  lib64  pyvenv.cfg  share
(venv) root@djangotest:~/djangotest/venv# cd bin/
(venv) root@djangotest:~/djangotest/venv/bin# ls
activate  activate.csh  activate.fish  Activate.ps1  django-admin  django-admin.py
easy_install  easy_install-3.8  pip  pip3  pip3.8  __pycache__  python  python3  sqlformat

# 장고 프로젝트 생성
(venv) root@djangotest:~/djangotest# django-admin startproject config .
(venv) root@djangotest:~/djangotest# ls
config  manage.py  venv

# django db table 생성을 위한 migrate 명령

(venv) root@djangotest:~/djangotest# python3 manage.py migrate
Operations to perform:
  Apply all migrations: admin, auth, contenttypes, sessions
Running migrations:
  Applying contenttypes.0001_initial... OK
  Applying auth.0001_initial... OK
  Applying admin.0001_initial... OK
  Applying admin.0002_logentry_remove_auto_add... OK
  Applying admin.0003_logentry_add_action_flag_choices... OK
  Applying contenttypes.0002_remove_content_type_name... OK
  Applying auth.0002_alter_permission_name_max_length... OK
  Applying auth.0003_alter_user_email_max_length... OK
  Applying auth.0004_alter_user_username_opts... OK
  Applying auth.0005_alter_user_last_login_null... OK
  Applying auth.0006_require_contenttypes_0002... OK
  Applying auth.0007_alter_validators_add_error_messages... OK
  Applying auth.0008_alter_user_username_max_length... OK
  Applying auth.0009_alter_user_last_name_max_length... OK
  Applying auth.0010_alter_group_name_max_length... OK
  Applying auth.0011_update_proxy_permissions... OK
  Applying auth.0012_alter_user_first_name_max_length... OK
  Applying sessions.0001_initial... OK

# migrate 명령을 하면 db.sqlite3 파일이 생성됨
(venv) root@djangotest:~/djangotest# ls
config  db.sqlite3  manage.py  venv
# 아래와 같이 개발 테스트 서버를 실행하고 웹 브라우저에서 ip:80(예로, xxxx.xxxx.xxxx.xxxx:80)으로 접속 시 다음과 같은 에러가 발생함.
Invalid HTTP_HOST header: 'xxxx.xxxx.xxxx.xxxx'. You may need to add 'xxxx.xxxx.xxxx.xxxx' to ALLOWED_HOSTS.
Bad Request: /favicon.ico
[19/Feb/2023 06:46:32] "GET /favicon.ico HTTP/1.1" 400 62847
# 위 내용을 보면, You may need to add 'xxxx.xxxx.xxxx.xxxx' to ALLOWED_HOSTS.라고 되어있음.
# 이 에러 메시지를 조치하기 위해 settings.py를 수정해야 함.
settings.py 파일이 있는 config 폴더로 이동하고, settings.py의 관련 내용을 아래와 같이 수정을 해야 한다
ALLOWED_HOSTS = [ ] 을
ALLOWED_HOSTS = ['*'] 로 수정
# 혹시, PuTTY 접속 후 vi 사용하여 수정할 경우에는
(venv) root@djangotest:~/djangotest# ls
config  db.sqlite3  manage.py  venv
(venv) root@djangotest:~/djangotest# cd config/
(venv) root@djangotest:~/djangotest/config# ls
asgi.py  __init__.py  __pycache__  settings.py  urls.py  wsgi.py
(venv) root@djangotest:~/djangotest/config# vi settings.py
-----------------------------------------------------------------
vi settings.py 명령을 주고,
i 누르고 insert 모드에서 수정을 하고,
수정 완료 후
ESC
:wq! Enter 명령을 주어 vi 편집기를 빠져 나온다.
------------------------------------------------------------------
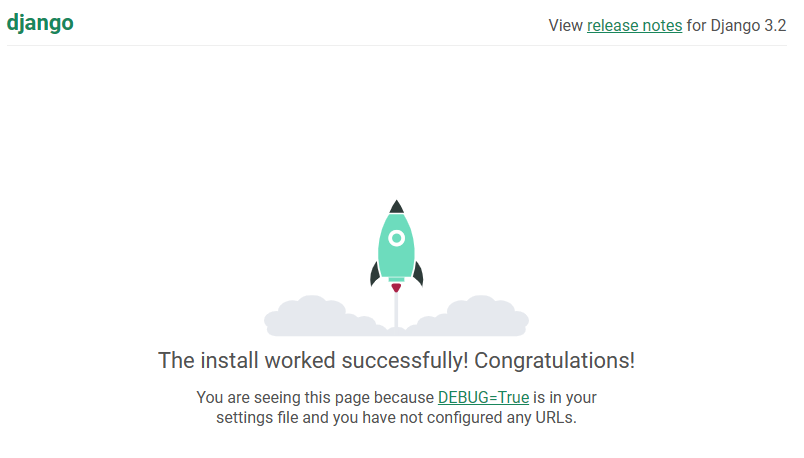
# 장고 로컬 테스트 서버 실행
(venv) root@djangotest:~/djangotest# python3 manage.py runserver xxx.xxx.xxx.xxx:80
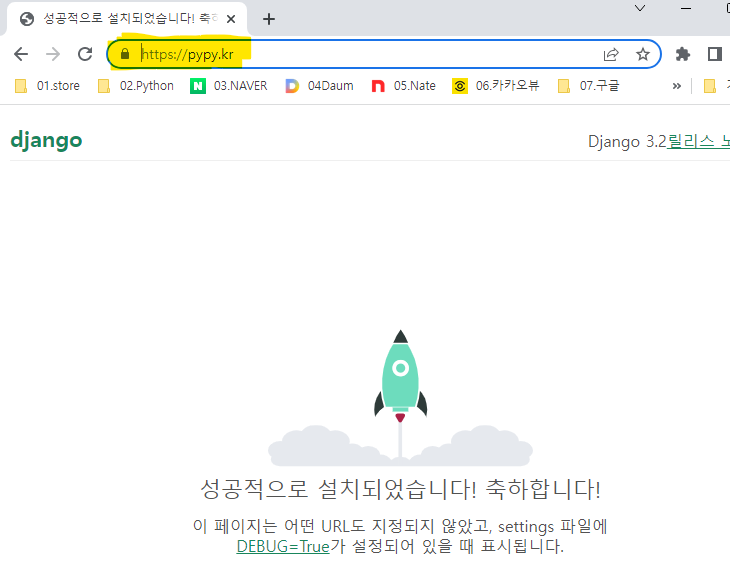
# python manage.py runserver 0.0.0.0:8000 시 xxx.xxx.xxx.xxx:8000 으로 접속- 접속은 웹 브라우저에서 해당 ip 또는 도메인(http://pypy.kr)으로 접속
그리고, 한글로 변환하고 싶은 경우 settings.py에서 아래 해당 내용을 수정하고 다시 접속하면 한글로 바뀐 화면을 볼 수 있다.
LANGUAGE_CODE = 'ko-kr'  # 'en-us'
TIME_ZONE = 'Asia/Seoul' # 'UTC'- 'en-us'를 'ko-kr'로, 'UTC'를 'Asia/Seoul'로 변경
Gunicorn 설치 및 설정
Gunicorn은 WSGI(Web Server Gateway Interface, NginX 같은 웹 서버가 동적 페이지 요청 위해 호출하는 서버)이다.
즉, Python 웹 애플리케이션 서버(WAS)로, WSGI 애플리케이션인 Django를 실행하는 데 사용할 수 있는 것으로 가상환경에서 gunicorn을 설치한다.
# whereis 명령으로 확인해보면 서버에 gunicorn이 설치되지 않았음을 알 수 있다.
(venv) root@djangotest:~/djangotest# whereis gunicorn
gunicorn:
(venv) root@djangotest:~/djangotest# deactivate
root@djangotest:~/djangotest# whereis gunicorn
gunicorn:
# 가상 환경이 아닌 상태에서 gunicorn을 설치해서 명령을 줬을 경우 failed 에러 메시지가 났기 때문에 가상환경에서 설치를 함.
root@djangotest:~/djangotest# source venv/bin/activate
(venv) root@djangotest:~/djangotest# pip3 install gunicorn
Collecting gunicorn
  Downloading gunicorn-20.1.0-py3-none-any.whl (79 kB)
     ━━━━━━━━━━━━━━━━━━ 79.5/79.5 kB 15.0 MB/s eta 0:00:00
Requirement already satisfied: setuptools>=3.0 in ./venv/lib/python3.9/site-packages (from gunicorn) (58.1.0)
Installing collected packages: gunicorn
Successfully installed gunicorn-20.1.0

(venv) root@djangotest:~/djangotest# whereis gunicorn  # gunicorn 위치 확인
gunicorn: /root/djangotest/venv/bin/gunicorn
# gunicorn 실행 명령(gunicorn --bind 0:8000 config.wsgi:application) 후 브라우저에서 http://localhost:8000 접속 성공함
(venv) root@djangotest:~/djangotest# gunicorn --bind 0:8000 config.wsgi:application
[2023-02-19 19:03:14 +0900] [444474] [INFO] Starting gunicorn 20.1.0
[2023-02-19 19:03:14 +0900] [444474] [INFO] Listening at: http://0.0.0.0:8000 (444474)
[2023-02-19 19:03:14 +0900] [444474] [INFO] Using worker: sync
[2023-02-19 19:03:14 +0900] [444475] [INFO] Booting worker with pid: 444475
[2023-02-19 19:04:20 +0900] [444474] [CRITICAL] WORKER TIMEOUT (pid:444475)
[2023-02-19 10:04:20 +0000] [444475] [INFO] Worker exiting (pid: 444475)
[2023-02-19 19:04:20 +0900] [444486] [INFO] Booting worker with pid: 444486- --bind 0:8000은 8000번 포트로 WSGI 서버 수행 의미이고, config.wsgi:application은 WSGI 서버가 호출하는 WSGI 애플리케이션(장고)의 config/wsgi.py 파일 내에 있는 application이라는 의미임
- 우분투 등 리눅스에서는 유닉스 소켓 방식(--bind unix:/tmp/gunicorn.sock)을 사용하는 것이 빠르고 효율적인데, --bind 0:8000 대신 유닉스 소켓 방식(--bind unix:/tmp/gunicorn.sock)으로 WSGI(gunicon) 서버를 실행할 수 없기 때문에 Nginx(웹 서버)같은 웹 서버가 필요하고, 이 웹 서버에 gunicorn 서비스를 등록하여 운영해야 함
PuTTY로 서버에 gunicorn 서비스 등록(gunicorn.service 파일 생성)하기
- 서버의 /etc/systemd/system/ 디렉토리에 gunicorn.service 파일 생성 (/etc/systemd/system/gunicorn.service)
- vi 에디터로 내용을 작성 후 저장
---------------------------------------------------------------
vi settings.py 명령을 주고,
i 누르고 insert 모드에서 수정을 하고,
수정이 완료되면
ESC
:wq! Enter 명령을 주어 vi 편집기를 빠져 나온다.
----------------------------------------------------------------
(venv) root@djangotest:~/djangotest# vi /etc/systemd/system/gunicorn.service
---------------------------------------------------
[Unit]
Description=gunicorn daemon
After=network.target

[Service]
User=root
Group=root
WorkingDirectory=/root/djangotest
ExecStart= /root/djangotest/venv/bin/gunicorn \
        --workers 4 \
        --bind unix:/tmp/gunicorn.sock \
        config.wsgi:application

[Install]
WantedBy=multi-user.target
---------------------------------------------------- User, Group : <서버 계정>
- WorkingDirectory : 작업 디렉토리(manage.py가 있는 폴더)
- ExecStart : gunicorn이 설치된 경로 (가상 환경 하에 설치함, whereis gunicorn 명령으로 확인 가능)
- --workers 4 : gunicorn 실행 프로세스로 CPU Core 2개 사용하라는 의미 (gunicorn Document 권장 개수는 Core 수 * 2 +1개), grep -c processor /proc/cpuinfo 명령으로 확인 가능
- --bind unix:/tmp/gunicorn.sock : bind 할 소켓 지정 (소켓 파일을 PATH 즉, /tmp/에 gunicorn.sock 파일이 생성되며, 이 소켓 파일은 nginx에서 gunicorn으로의 reverse proxy를 구성할 때 path로 지정할 수 있음)
- config.wsgi:application : wsgi가 있는 위치와 wsgi 애플리케이션 지정. 즉, 장고 프로젝트 폴더 config에 있는 wsgi.py에 application 지정함
# gunicorn.service 파일 유무 확인 명령
(venv) root@djangotest:~/djangotest# ls /etc/systemd/system/

# cat gunicorn.service 명령으로 파일 내용 확인
(venv) root@djangotest:~/djangotest# cat /etc/systemd/system/gunicorn.service

# gunicorn 서비스 시작
(venv) root@djangotest:~/djangotest# sudo systemctl daemon-reload
(venv) root@djangotest:~/djangotest# sudo systemctl start gunicorn.service
(venv) root@djangotest:~/djangotest# sudo systemctl status gunicorn.service
-----------------------------------------------------------------------------------------------------
● gunicorn.service - gunicorn daemon
     Loaded: loaded (/etc/systemd/system/gunicorn.service; disabled; vendor preset: enabled)
     Active: active (running) since Sun 2023-02-19 20:23:03 KST; 5s ago
   Main PID: 444931 (gunicorn)   ## stop 시 (dead)
      Tasks: 5 (limit: 1125)
     Memory: 114.0M
     CGroup: /system.slice/gunicorn.service
             ├─444931 /root/djangotest/venv/bin/python3.9 /root/djangotest/venv/bin/gunicorn --workers 4>
             ├─444940 /root/djangotest/venv/bin/python3.9 /root/djangotest/venv/bin/gunicorn --workers 4>
             ├─444941 /root/djangotest/venv/bin/python3.9 /root/djangotest/venv/bin/gunicorn --workers 4>
             ├─444942 /root/djangotest/venv/bin/python3.9 /root/djangotest/venv/bin/gunicorn --workers 4>
             └─444943 /root/djangotest/venv/bin/python3.9 /root/djangotest/venv/bin/gunicorn --workers 4>

Feb 19 20:23:03 djangotest.cafe24.com systemd[1]: Started gunicorn daemon.
Feb 19 20:23:03 djangotest.cafe24.com gunicorn[444931]: [2023-02-19 20:23:03 +0900] [444931] [INFO] >
Feb 19 20:23:03 djangotest.cafe24.com gunicorn[444931]: [2023-02-19 20:23:03 +0900] [444931] [INFO] >
Feb 19 20:23:03 djangotest.cafe24.com gunicorn[444931]: [2023-02-19 20:23:03 +0900] [444931] [INFO] >
Feb 19 20:23:03 djangotest.cafe24.com gunicorn[444940]: [2023-02-19 20:23:03 +0900] [444940] [INFO] >
Feb 19 20:23:03 djangotest.cafe24.com gunicorn[444941]: [2023-02-19 20:23:03 +0900] [444941] [INFO] >
Feb 19 20:23:03 djangotest.cafe24.com gunicorn[444942]: [2023-02-19 20:23:03 +0900] [444942] [INFO] >
Feb 19 20:23:03 djangotest.cafe24.com gunicorn[444943]: [2023-02-19 20:23:03 +0900] [444943] [INFO] >
lines 1-21/21 (END)
------------------------------------------------------------------------------------------------------ gunicorn 서비스 시작 : sudo systemctl start gunicorn.service
- gunicorn 서비스 상태 확인 : sudo systemctl status gunicorn.service
- 서버 시작 시 gunicorn 서비스 자동 실행 : sudo systemctl enable gunicorn.service
- gunicorn 서비스 중지 : sudo systemctl stop gunicorn.service
Nginx 설치 및 설정
- Nginx(엔진엑스)는 정적인 파일을 처리하는 HTTP 서버이며 동시 접속 처리에 특화된 웹 서버로 트래픽이 많은 웹 사이트 호스팅에 주로 사용되며, Apache보다 동작이 단순하고 가벼운 특징이 있다.
- 또한, Nginx는 Django Applicatin 서버에 요청을 보내는 리버스 프록시 기능과 비동기 처리가 가능하다.
# Nginx가 제대로 설치되어 실행 중이면 다음과 같은 출력됨
nginx.service - A high performance web server and a reverse proxy server
Loaded: loaded (/lib/systemd/system/nginx.service; enabled; vendor preset: enabled)
Active: active (running) since Mon 2023-02-14 10:00:00 EST; 1min ago
Nginx 설치
가상환경에서 관리자 권한으로 nginx를 설치한다.
(venv) root@djangotest:~/djangotest# sudo apt install nginx

(venv) root@djangotest:~/djangotest# sudo systemctl status nginx
------------------------------------------------------------------------------------------------------
● nginx.service - A high performance web server and a reverse proxy server
     Loaded: loaded (/lib/systemd/system/nginx.service; enabled; vendor preset: enabled)
     Active: active (running) since Sun 2023-02-19 20:31:59 KST; 2min 3s ago
       Docs: man:nginx(8)
   Main PID: 445521 (nginx)
      Tasks: 7 (limit: 1125)
     Memory: 9.7M
     CGroup: /system.slice/nginx.service
             ├─445521 nginx: master process /usr/sbin/nginx -g daemon on; master_process on;
             ├─445522 nginx: worker process
             ├─445523 nginx: worker process
             ├─445524 nginx: worker process
             ├─445525 nginx: worker process
             ├─445526 nginx: worker process
             └─445527 nginx: worker process

Feb 19 20:31:59 djangotest.cafe24.com systemd[1]: Starting A high performance web server and a rever>
Feb 19 20:31:59 djangotest.cafe24.com systemd[1]: Started A high performance web server and a revers>
lines 1-18/18 (END)
------------------------------------------------------------------------------------------------------
# nginx 설치 후 nginx 설치 폴더를 확인하면,
(venv) root@djangotest:~/djangotest# whereis nginx
nginx: /usr/sbin/nginx /usr/lib/nginx /etc/nginx /usr/share/nginx /usr/share/man/man8/nginx.8.gz
(venv) root@djangotest:~/djangotest#- 여기서 장고 관련 파일은 /etc/nginx/sites-available 디렉터리에 설정 파일을 저장하는데, 실제 nginx는 /etc/nginx/sites-enabled 경로에 있는 파일을 보고 있다고 함.
- sites-available 폴더는 설정을 저장하는 폴더이고, sites-enabled 디렉터리는 site-available 디렉터리에 있는 설정 파일 중에서 활성화하고 싶은 것을 링크로 관리하는 디렉터리임. 그래서 설정 파일을 sites-enabled 폴더로 복사해주어야 하는데, /etc/nginx/sites-available/ 경로에 원하는 사이트(내용)를 입력한 뒤에 /etc/nginx/sites-enabled로 링크를 걸어주는 것이 정석이라고 한다.
# sites-available 디렉터리에 설정 파일 생성
(venv) root@djangotest:~/djangotest# vi /etc/nginx/sites-available/djangotest
---------------------------------------------------
server {
    listen 80;
    server_name pypy.kr www.pypy.kr;
    location = /favicon.ico { access_log off; log_not_found off; }
    location /static {
        alias /root/djangotest/static;
    }
    location / {
        include proxy_params;
        proxy_pass http://unix:/tmp/gunicorn.sock;
    }
}
---------------------------------------------------- 브라우저(클라이언트)에서 IP(port 80 서비스) 접속 요청을 보내면 gunicorn의 유닉스 소켓으로 보내서(location 즉, gunicorn으로 연결되어) 요청이 처리가 되는 것으로,
- location /static 은 정적 파일을 nginx가 /static 경로의 파일을 읽어서 처리하게 하는 설정이고,
- 밑에 있는 location / 은 location /static 에서 설정한 것을 제외하고 모든 요청을 gunicorn이 처리하도록 설정함
- procy_pass는 동적 요청에 대해 gunicorn의 유닉스 소켓방식으로 처리하도록 함
(venv) root@djangotest:~/djangotest# ls /etc/nginx/sites-available
default  djangotest
(venv) root@djangotest:~/djangotest# ls /etc/nginx/sites-enabled
default
(venv) root@djangotest:~/djangotest# cat /etc/nginx/sites-available/djangotest

server {
    listen 80;
    server_name pypy.kr www.pypy.kr;
    location = /favicon.ico { access_log off; log_not_found off; }
    location / {
        alias /root/djangotest/static;
    }
    location / {
        include proxy_params;
        proxy_pass http://unix:/tmp/gunicorn.sock;
    }
}
(venv) root@djangotest:~/djangotest#
# Nginx가 환경 파일로 읽을 수 있도록 설정(nginx - gunicorn - django 연결 위해 sites-enabled 폴더로 설정 파일 복사)
1) /etc/nginx/sites-enabled 폴더로 이동 후 default 링크 삭제
2) 설정 파일(djangotest) 링크
※ 리눅스 ln (link) 명령어 - 한 파일을 다른 파일 이름으로도 사용하고자 할 때 사용하는 파일 연결 명령어로 하나의 파일에 이름을 두 개 유지하는 방법을 제공하는 것으로,
명령은 sudo ln -s /etc/nginx/sites-available/djangotest /etc/nginx/sites-enabled
(venv) root@djangotest:~/djangotest# cd  /etc/nginx/sites-enabled
(venv) root@djangotest:/etc/nginx/sites-enabled# ls
default
(venv) root@djangotest:/etc/nginx/sites-enabled# sudo rm default
(venv) root@djangotest:/etc/nginx/sites-enabled# ls
(venv) root@djangotest:/etc/nginx/sites-enabled# sudo ln -s /etc/nginx/sites-available/djangotest /etc/nginx/sites-enabled
(venv) root@djangotest:/etc/nginx/sites-enabled# ls /etc/nginx/sites-enabled
djangotest
(venv) root@djangotest:/etc/nginx/sites-enabled# cat /etc/nginx/sites-enabled/djangotest
server {
    listen 80;
    server_name pypy.kr www.pypy.kr;
    location = /favicon.ico { access_log off; log_not_found off; }
    location / {
        alias /root/djangotest/static;
    }
    location / {
        include proxy_params;
        proxy_pass http://unix:/tmp/gunicorn.sock;
    }
}
(venv) root@djangotest:/etc/nginx/sites-enabled# cd ~
(venv) root@djangotest:~# ls
djangotest
(venv) root@djangotest:~# cd djangotest/
(venv) root@djangotest:~/djangotest#
Nginx 실행
Nginx는 설치 시 자동 실행되므로 작성한 설정 사항을 적용하려면 sudo systemctl restart nginx 명령으로 다시 시작해야 하는데, 시작 전에 nginx 설정 파일 문법 검사 명령(sudo nginx -t)을 주어야 함.
(venv) root@djangotest:~/djangotest# sudo nginx -t
nginx: the configuration file /etc/nginx/nginx.conf syntax is ok
nginx: configuration file /etc/nginx/nginx.conf test is successful

(venv) root@djangotest:~/djangotest# sudo systemctl restart nginx.service
(venv) root@djangotest:~/djangotest# sudo systemctl status nginx.service
● nginx.service - A high performance web server and a reverse proxy server
     Loaded: loaded (/lib/systemd/system/nginx.service; enabled; vendor preset: enabled)
     Active: active (running) since Sun 2023-02-19 21:10:28 KST; 12s ago
       Docs: man:nginx(8)
    Process: 447162 ExecStartPre=/usr/sbin/nginx -t -q -g daemon on; master_process on; (code=ex>
    Process: 447164 ExecStart=/usr/sbin/nginx -g daemon on; master_process on; (code=exited, sta>
   Main PID: 447174 (nginx)
      Tasks: 7 (limit: 1125)
     Memory: 6.7M
     CGroup: /system.slice/nginx.service
             ├─447174 nginx: master process /usr/sbin/nginx -g daemon on; master_process on;
             ├─447175 nginx: worker process
             ├─447176 nginx: worker process
             ├─447177 nginx: worker process
             ├─447178 nginx: worker process
             ├─447179 nginx: worker process
             └─447180 nginx: worker process

Feb 19 21:10:28 djangotest.cafe24.com systemd[1]: Starting A high performance web server and a rever>
Feb 19 21:10:28 djangotest.cafe24.com systemd[1]: Started A high performance web server and a revers>
lines 1-20/20 (END)
※ Nginx를 중지/시작/상태 확인 명령은 다음과 같다.
Nginx 재시작 전 sudo nginx -t
sudo systemctl stop nginx
sudo systemctl start nginx
sudo systemctl status nginx
sudo systemctl restart nginx
# settings.py ALLOWED_HOSTS = ['*'] 상태에서 브라우저 http://pypy.kr 또는 http://www.pypy.kr 또는 http://ip 접속 모두 성공함
# ALLOWED_HOSTS = ['pypy.kr', 'www.pypy.kr', 'xxx.xxx.xxx.xxx'] 설정 변경 시 http://ip는 접속이 안 되니 ALLOWED_HOSTS = ['pypy.kr', 'www.pypy.kr']으로 설정함
# 그리고 이제부터는 장고 app 등에 대한 코드 수정 후에는 gunicorn을 재 시작해야 반영이 되고 정상적으로 웹 브라우저 접속이 된다는 점을 알아야 함
위 진행 절차를 완료하고 크롬 등 브라우저에서 http://pypy.kr "주의요함"이라는 문구가 나오며, 이문구가 안 나오게 하려면 SSL(Secure Socket Layer) 보안 인증을 설치해야 함
SSL 설치 및 설정
- SSL 은 PuTTY 활용하여 작업을 진행한다.
- 방화벽을 활성화 시키려면, cafe24.com에서 방화벽 관리 메뉴를 통해 방화벽 상태를 ON 시킴
certbot python3-certbot-nginx 설치
(venv) root@djangotest:~/djangotest# sudo apt install certbot python3-certbot-nginx# 설치 중간에 아래와 같이 이메일 입력과 동의/취소 등의 선택 질문이 나온다
- (Enter 'c' to cancel): 이메일 입력
- (A)gree/(C)ancel: A
- (Y)es/(N)o: Y
# -d pypy.kr -d www.pypy.kr : https:// 적용할 도메인은 모두 추가함
(venv) root@djangotest:~/djangotest# sudo certbot --nginx -d pypy.kr -d www.pypy.kr
Saving debug log to /var/log/letsencrypt/letsencrypt.log
Plugins selected: Authenticator nginx, Installer nginx

Which names would you like to activate HTTPS for?
- - - - - - - - - - - - - - - - - - - - - - - - - - - - - - - - - - - - - - - -
1: pypy.kr
- - - - - - - - - - - - - - - - - - - - - - - - - - - - - - - - - - - - - - - -
Select the appropriate numbers separated by commas and/or spaces, or leave input
blank to select all options shown (Enter 'c' to cancel): 1
Obtaining a new certificate
Deploying Certificate to VirtualHost /etc/nginx/sites-enabled/djangotest

Please choose whether or not to redirect HTTP traffic to HTTPS, removing HTTP access.
- - - - - - - - - - - - - - - - - - - - - - - - - - - - - - - - - - - - - - - -
1: No redirect - Make no further changes to the webserver configuration.
2: Redirect - Make all requests redirect to secure HTTPS access. Choose this for
new sites, or if you're confident your site works on HTTPS. You can undo this
change by editing your web server's configuration.
- - - - - - - - - - - - - - - - - - - - - - - - - - - - - - - - - - - - - - - -
Select the appropriate number [1-2] then [enter] (press 'c' to cancel): 2
Redirecting all traffic on port 80 to ssl in /etc/nginx/sites-enabled/djangotest

- - - - - - - - - - - - - - - - - - - - - - - - - - - - - - - - - - - - - - - -
Congratulations! You have successfully enabled https://pypy.kr and
https://www.pypy.kr

You should test your configuration at:
https://www.ssllabs.com/ssltest/analyze.html?d=pypy.kr
https://www.ssllabs.com/ssltest/analyze.html?d=www.pypy.kr
- - - - - - - - - - - - - - - - - - - - - - - - - - - - - - - - - - - - - - - -

IMPORTANT NOTES:
 - Congratulations! Your certificate and chain have been saved at:
   /etc/letsencrypt/live/pypy.kr/fullchain.pem
   Your key file has been saved at:
   /etc/letsencrypt/live/pypy.kr/privkey.pem
   Your cert will expire on 2023-05-30. To obtain a new or tweaked
   version of this certificate in the future, simply run certbot again
   with the "certonly" option. To non-interactively renew *all* of
   your certificates, run "certbot renew"
 - If you like Certbot, please consider supporting our work by:

   Donating to ISRG / Let's Encrypt:   https://letsencrypt.org/donate
   Donating to EFF:                    https://eff.org/donate-le


(venv) root@djangotest:~/djangotest#
# /etc/nginx/sites-available/djangotest 부분을 변경하려고 했으나 이미 자동으로 아래와 같이 변경이 되어있었음
(venv) root@djangotest:~/djangotest# cat /etc/nginx/sites-available/djangotest
------------------------------------------------------------------------------
server {
    server_name pypy.kr www.pypy.kr;
    location /favicon.ico { access_log off; log_not_found off; }
    location / {
        include proxy_params;
        proxy_pass http://unix:/tmp/gunicorn.sock;
    }

    listen 443 ssl; # managed by Certbot
    ssl_certificate /etc/letsencrypt/live/pypy.kr/fullchain.pem; # managed by Certbot
    ssl_certificate_key /etc/letsencrypt/live/pypy.kr/privkey.pem; # managed by Certbot
    include /etc/letsencrypt/options-ssl-nginx.conf; # managed by Certbot
    ssl_dhparam /etc/letsencrypt/ssl-dhparams.pem; # managed by Certbot


}
server {
    if ($host = www.pypy.kr) {
        return 301 https://$host$request_uri;
    } # managed by Certbot


    if ($host = pypy.kr) {
        return 301 https://$host$request_uri;
    } # managed by Certbot


    listen 80;
    server_name pypy.kr www.pypy.kr;
    return 404; # managed by Certbot
------------------------------------------------------------------------------
# 다음 명령을 실행하여 Nginx 구성을 테스트한다.
(venv) root@djangotest:~/djangotest# sudo nginx -t
nginx: the configuration file /etc/nginx/nginx.conf syntax is ok
nginx: configuration file /etc/nginx/nginx.conf test is successful
# 웹 서버(Nginx)를 재 시작합니다.
sudo systemctl reload nginx
# 잔여 인증기간 확인
sudo certbot certificates
(venv) root@djangotest:~/djangotest# sudo certbot certificates
Saving debug log to /var/log/letsencrypt/letsencrypt.log
- - - - - - - - - - - - - - - - - - - - - - - - - - - - - - - - - - - - - - - -
Found the following certs:
  Certificate Name: pypy.kr
    Domains: pypy.kr www.pypy.kr
    Expiry Date: 2023-05-30 01:33:30+00:00 (VALID: 89 days)
    Certificate Path: /etc/letsencrypt/live/pypy.kr/fullchain.pem
    Private Key Path: /etc/letsencrypt/live/pypy.kr/privkey.pem
- - - - - - - - - - - - - - - - - - - - - - - - - - - - - - - - - - - - - - - -
# SSL 자동으로 갱신 (3개월뒤에 자동으로 갱신되는 스케쥴 등록)
(venv) root@djangotest:~/djangotest# sudo certbot renew --dry-run
위와 같이 SSL 설정을 한 후 웹 브라우저로 접속(https://pypy.kr 또는 https://www.pypy.kr) 시 보안이 적용된 상태로 장고 웹이 열렸다.
# 2023. 5.21. 내용 추가
SSL letsencrypt 종료일 확인 하고 다시 3개월 연장하려고 서버 접속 후 다음 명령으로 내용 출력함
(venv) root@djangotest:~/djangotest# sudo certbot certificates
Saving debug log to /var/log/letsencrypt/letsencrypt.log

- - - - - - - - - - - - - - - - - - - - - - - - - - - - - - - - - - - - - - - -
Found the following certs:
  Certificate Name: pypy.kr
    Domains: pypy.kr www.pypy.kr
    Expiry Date: 2023-07-29 12:24:28+00:00 (VALID: 69 days)
    Certificate Path: /etc/letsencrypt/live/pypy.kr/fullchain.pem
    Private Key Path: /etc/letsencrypt/live/pypy.kr/privkey.pem
- - - - - - - - - - - - - - - - - - - - - - - - - - - - - - - - - - - - - - - -
그런데, Expiry Date: 2023-07-29로 나왔다. 지난달 말에 만기 30일 전에 연장하라고 메일이 왔었는데, SSL 자동으로 갱신 명령으로 인해 3개월이 자동 연장된 듯 함. 2개월 뒤 다시 접속하여 확인해봐야 할 듯...
'IT(Tip)' 카테고리의 다른 글
| 엑셀 줄바꿈 특수문자 없애기 (0) | 2023.04.05 |
|---|---|
| VS Code에서 파이썬 인터프리터 확인하고 선택하는 방법 (0) | 2023.03.25 |
| 빅데이터분석기사 유튜브 채널 (0) | 2023.02.21 |
| 구글 API - 사용자 인증 정보 생성하기 (0) | 2023.02.16 |
| [chatGPT] 유튜브 영상 스크립트 추출 파이썬 코드 질문 (0) | 2023.02.14 |


댓글